> For the complete documentation index, see [llms.txt](https://documentation.powerimporter.com/llms.txt). Markdown versions of documentation pages are available by appending `.md` to page URLs; this page is available as [Markdown](https://documentation.powerimporter.com/step-by-step-guides/how-to-create-a-wordpress-to-webflow-migration/test-and-review-your-wordpress-to-webflow-migration.md).
# Test & review your WordPress to Webflow migration
Before you run your WordPress to Webflow migration, you should use the Test & Review function to find and amend any errors. We recommend that you do so in order to spot an errors and have the opportunity to correct these before running your "real" migration.
**COMMON ERRORS INCLUDE:**\
\- Title too long: over 256 characters (this is a Webflow limitation)\
\- Image size too large: over 4MB (this is a Webflow limitation)\
\- No slug: if you are migrating your slugs from WordPress to Webflow, posts without a slug in WordPress will not be exported to Webflow at all. If you are not migrating your slugs, this will not be an issue.\
\
**LOGS WHEN TESTING & REVIEWING**\
Testing and reviewing enables you to run the sync without calling the Webflow API - it means you can test it and see if it will work.\
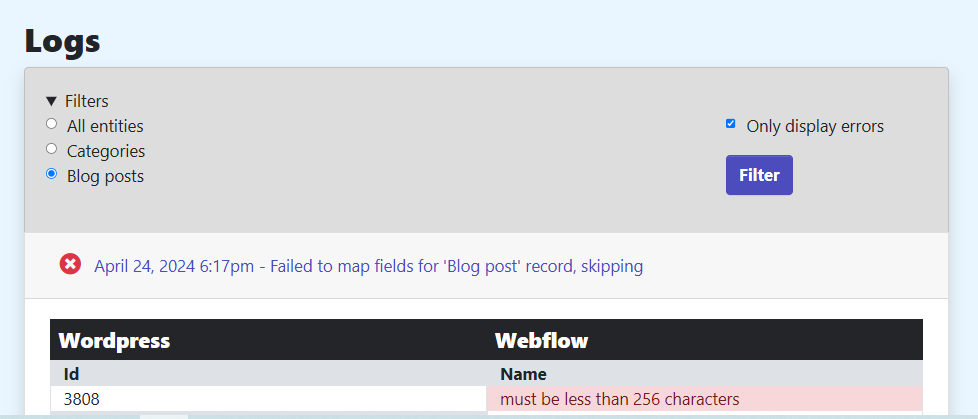
Your log will show whether there are any issues, which would show in a red column.
\
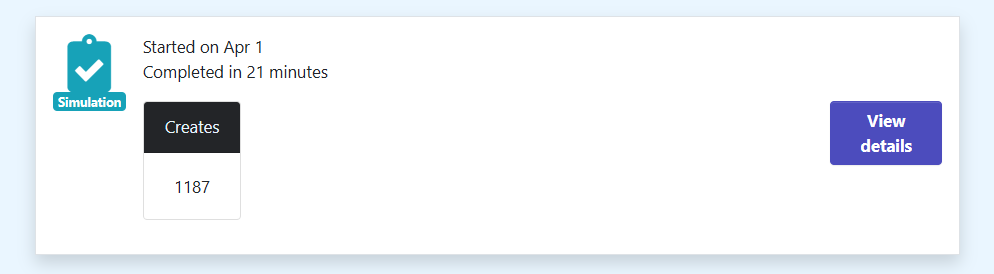
The screenshot below shows a fully successful test:
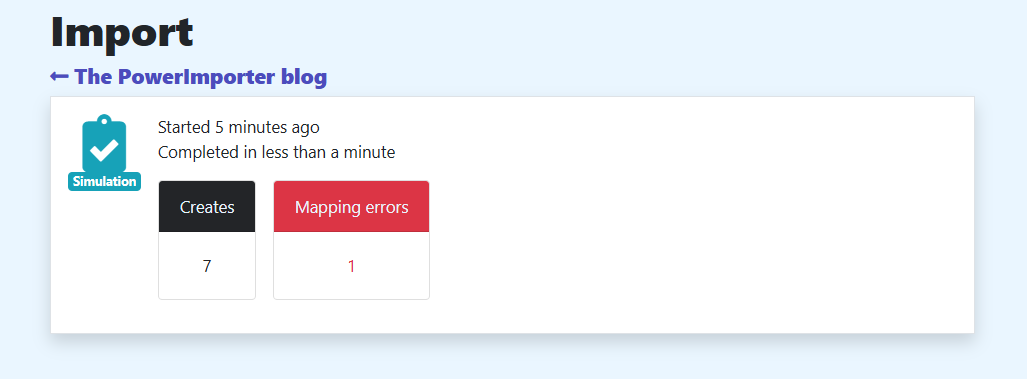
The screenshot below shows a test with an error:
**ERROR FILTERING**\
\- You can filter the logs by Webflow category (on the left-hand side). They will be listed automatically by PowerImporter.\
\- You can also filter to only display the errors (on the right-hand side).\
\- The error log will show you which field of the blog post has an error. For example: name, slug, image, etc.\
\- Your error log will also tell you whether the blog post is skipped due to the error. *Skipping* means the blog post will not be imported to Webflow at all.
If you want more detail on one blog post, you can click on view: this will show the exact data that would be transferred over to Webflow.
**DOWNOADING YOUR ERRORS**
You can download your errors into an Excel file.
This can make it easier for you to view all your errors at once.
Click on the "Export error logs" button, and an XLS file will be produced and downloaded to your computer.
**IF YOU HAVE ERRORS**\
We recommend that you correct your errors in WordPress before running your "real" migration.\
\- Correct your errors in WordPress\
\- Run another data export\
\- Go back to PowerImporter > Your syncs > *go to your migration* > Step 2 "Upload WordPress"\
\- Upload your new file\
\- Test and review again in Step 4
\
You can of course ignore the errors if they are not important to you.\
\
Happy migrating!
---
# Agent Instructions
This documentation is published with GitBook. GitBook is the documentation platform designed so that both humans and AI agents can read, navigate, and reason over technical content effectively. Learn more at gitbook.com.
## Querying This Documentation
If you need additional information that is not directly available in this page, you can query the documentation dynamically by asking a question.
Perform an HTTP GET request on the current page URL with the `ask` query parameter, and the optional `goal` query parameter:
```
GET https://documentation.powerimporter.com/step-by-step-guides/how-to-create-a-wordpress-to-webflow-migration/test-and-review-your-wordpress-to-webflow-migration.md?ask=&goal=
```
`ask` is the immediate question: it should be specific, self-contained, and written in natural language.
`goal` is optional and describes the broader end goal you are ultimately trying to accomplish on behalf of the user. GitBook uses it to tailor the answer towards what is most useful for that goal.
The response will contain a direct answer to the question and relevant excerpts and sources from the documentation.
Use this mechanism when the answer is not explicitly present in the current page, you need clarification or additional context, or you want to retrieve related documentation sections.